Canopies
Canopies for airplanes often cause modelers a bit of grief. The reason is that these clear plastic parts have a very narrow region, representing the metallic frame, that needs to painted. This can be done by hand if you have a very fine-tipped brush and a very steady hand. One slip and the clear section can be smeared in paint. At best, you will have slightly wavy lines to the frame.
Masking
A better way is to mask off the canopy, cut away the mask from the frame portion, then paint it. Various masking materials can be used for this. Tamiya or other masking tape can be applied in layers. A couple of other products than go even better around compound curves are shown below left: Bare-Metal Foil, and liquid Micro Mask.
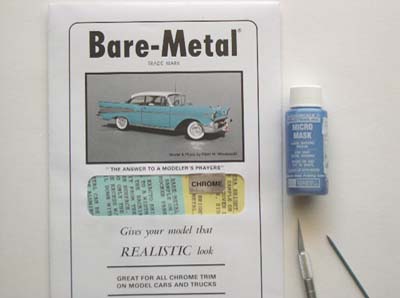
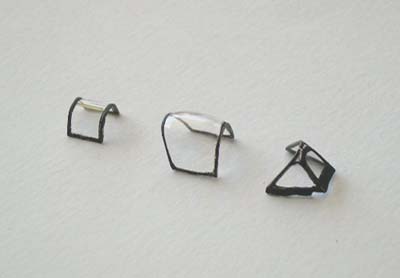
To use Micro Mask, simply brush on a thin layer, and let dry overnight. You will now have a thin rubbery film on the whole canopy. With a sharp new blade, cut away the film that covers the frame sections.
Go over the edges of the film with a toothpick to make sure that they are sealed. Then paint the canopy. When dry, remove the mask from the clear portions. The canopy sections on the right (above) were painted with the help of Micro Mask.
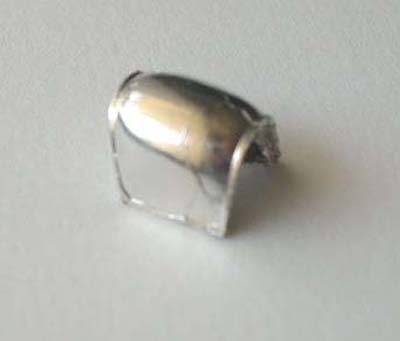
The Bare-Metal is like very thin aluminum foil, with a self-adhesive backing. Cut it a bit oversize with scissors. Remove the protective paper from the back and place over the canopy section, initially sticking it to just the top.
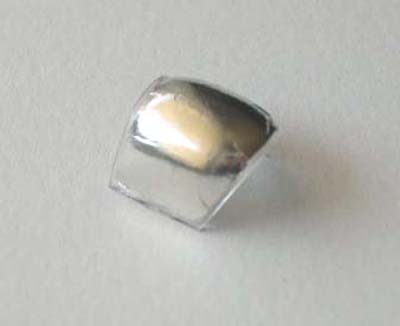
Burnish down with a Q-tip: start at the top, then go down one side, then the other. You'll be surprised how well the foil will conform to the curves. There will be some wrinkles, but we'll take of them later. Next burnish more precisely with a toothpick, paying special attention the joint between the frame and the canopy 'glass'.
When satisfied with the burnishing, use a very sharp hobby knife to remove the excess. You can apply small pieces of foil to patch any areas that need it.
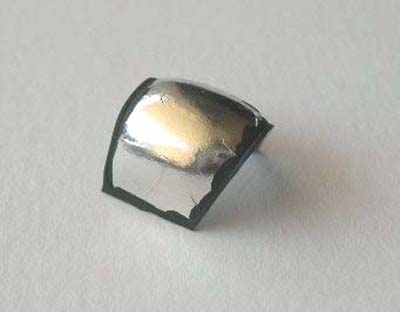
Then paint the frames, by hand or spray. After the paint is dry, it's helpful to gently run the knife along the edge of the frame, as this will help with the foil removal.
The use the knife to carefully peel back an edge of the foil, and remove from the clear portion. The photo sequence below illustrates the technique (balsa wood used in place of toothpick):

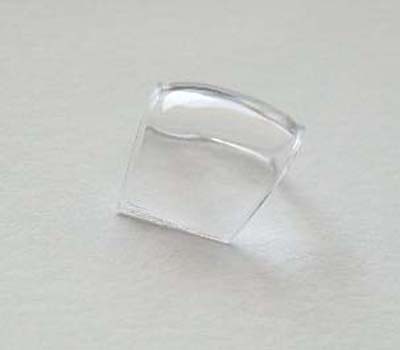
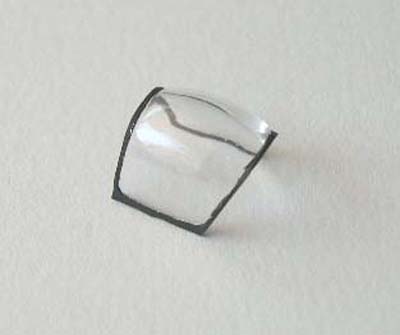
If there is glue residue from the foil on the clear parts, you can remove it by gently rubbing with a soft piece of cloth, a q-tip, or soft wood. A toothpick can be used for cleaning up stubborn areas, as well as for removing any paint that might have "crept" under the masking material.
Repair and Restoration
Some people use Future Floor Wax (a clear liquid acrylic, available at drugstores) to help with canopy preparation. It can be used before or after painting the frames, and helps eliminate scratches from canopies and restores the piece to a nice shine. Using tweezers, dip the part in a container of Future, then place on a paper towel. Use a small piece of paper towel to draw away the excess liquid that runs down to the edges. Leave to dry overnight, in a dust-free room/container. If necessary, Future can be removed with Windex window cleaner.
If Future has been used on the canopy, do not use a liquid mask contain ammonia (e.g. Maskol) as this will damage the Future layer. Micro Mask has been reported safe for canopies dipped in Future.
Attachment
Canopies can be attached by various types of glue. Standard Testors glue will work, as will white glue. Some people use CA glue, although care must be taken with this, as CA glue can cause the canopy to "fog", or get a slightly cloudy or frosty look. This effect can be reduced by: (1) coating the canopy in Future before gluing (2) applying the masking material before gluing (3) using a soft tool (toothpick) to rub on any resulting frosted area.
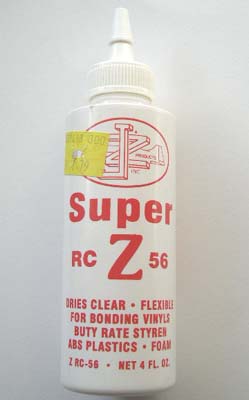
Our favorite glue for attaching canopies is RC56. You'll find this in the radio control aisle of your hobby shop, as it was designed for attaching canopies on RC airplanes. It goes on white, and dries clear. It's slow-drying, water-soluble, flexible when set, and will not fog the canopy. Apply as a thin bead using a pin. Any excess can be removed using a toothpick or a cotton swab dipped in water. Being flexible, this material does not sand well, so any excess that squeezes to the surface is best removed when still wet.
Painting in Place
Canopies can be masked and painted separately from the rest of the airplane, then added at the very end of construction. The cockpit opening is filled with wet tissue to mask the interior during painting. The advantage of this method is simplicity. If you use this method, it's best to check the fit of the canopy early in the construction process. You may need to trim the pilot seat, fuselage sides, etc, to make the canopy fit right.Nothing is more frustrating than to get to the very end of construction/painting/final assembly, only to find that the windscreen and canopy do not fit the model! We wonder how many projects have been abandoned at this stage...
Another disadvantage of this method is that the shade of paint may not match exactly that on the rest of the airplane. Also if the airplane wears camouflage paint, the color separation lines on the real thing sometimes fall on the canopy, which is difficult to get exactly right if the canopy is painted separately.
To combat these disadvantages, some modelers prefer to glue the canopy in place on the model, fill any gaps, then mask it, then start to paint. All of the painting and clear coats are done with the canopy in place, and the unmasking of the canopy is done last. The canopy itself serves as the mask for the cockpit interior during painting. The filler can be CA glue, if precautions are taken to prevent fogging as discussed above. We've used to RC56 as filler, again care must be taken to shape while wet.
There is more than one way to paint in place:
1) The simplest case is a one-piece windscreen and canopy. Glue canopy in place on the fuselage, use filler at the joint, sand the joint, mask and paint.
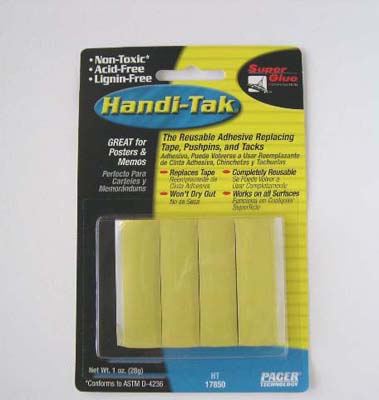
2) If the windscreen portion is fixed and the canopy is to remain removable (sliding), then you will need to use a temporary glue to hold everything together. There is a poster-mounting material known as Blu-Tack which works well for this. There are other version such as Fun-Tak, and Handi-Tak (shown below). Pinch off a piece and roll a thin bead between your fingers. Put the bead all around the opening where the sliding canopy will go. Press firmly into place. You can remove the excess with a toothpick, or by sticking it to a larger blob of the same material. When satisfied with the seal, mask and paint.
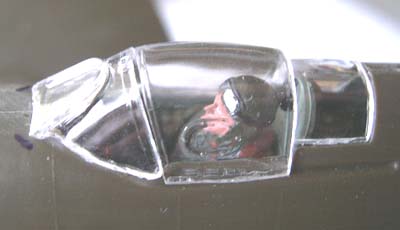
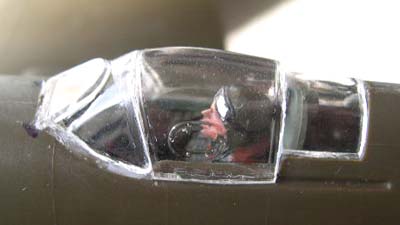
3) A challenging situation happens when the canopy has two or more portions, and you would like to pose it closed. The fit may not be perfect, so you must seal the gaps between the clear pieces. On the Spitfire below (left), there were gaps between the front windscreen and the fuse, the front windscreen and the sliding canopy, and the sliding canopy and the rear windscreen. These gaps were filled with RC56, as shown below right.
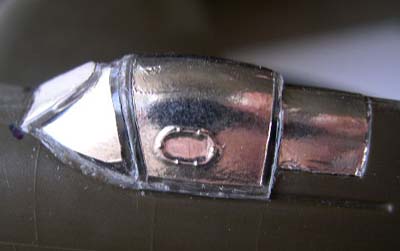
Below: Canopy masked with Bare Metal Foil.
Interior Frame Color
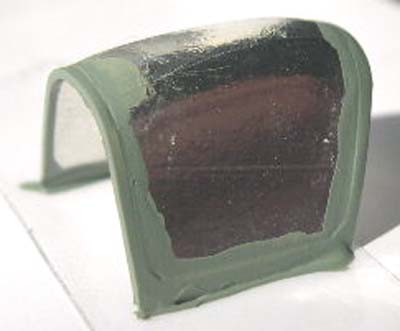
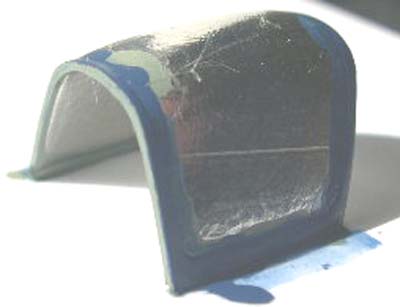
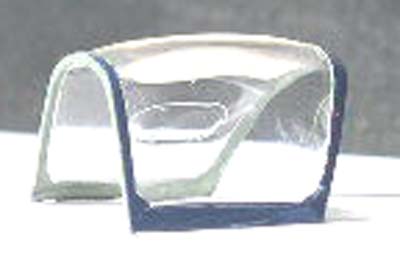
The inside of the canopy frames is generally painted a different color than the outside. To accomplish the effect on a model, the canopy can be masked and painted on the inside, then again on the outside. Masking on the inside of curved surface is quite challenging, and most people would prefer to avoid doubling their work. A simple way to achieve the inside color is this: mask on the outside only, paint the interior color first (on the outside), then paint the exterior color! Since the canopy material is transparent, it will appear that the inside of the frames have been painted a different color.
Below: Canopy masked with bare-metal foil. The frames are first painted interior green (left), then after drying painted blue (center), then the canopy is unmasked (right) to reveal the two-color effect.
Send us your comments below! Login with your Facebook, Twitter, Google or Yahoo account.
